
Getting Started With Your VM

The VM is the leading air disinfection product on the market. The purpose of this guide is to quickly get the VM up and running and ensure you get the most out of it. If you have any questions about this process, please contact us or email us at support@violettuv.com.
What’s covered:
- What comes with the VM
- Installing filters before first use
- Connecting the VM to WiFi
1. What comes with the VM

2: Installing filters before first use
The VM comes with three filters:
- Pleated H13 HEPA filter
- Activated carbon pre-filter
- An odor removing Nanofilter sock
- Setting up the Violett Dashboard
⚠️ These filters need to be installed before using the VM for the first time for the device to work properly.
Step 1: Remove the VM grate and activated carbon filter
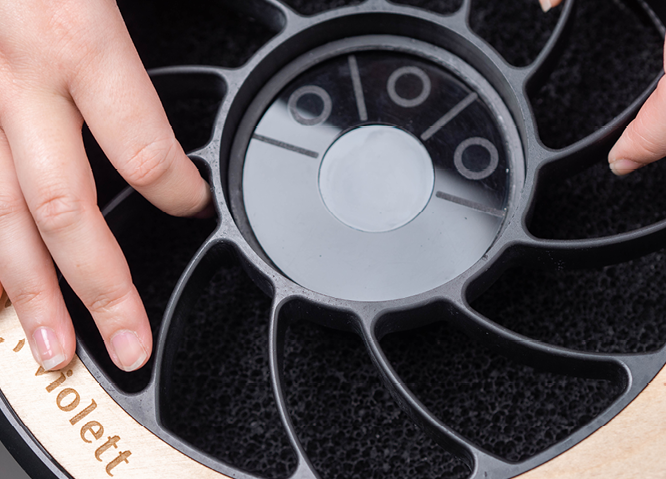
- Ensure the Violett unit is not plugged in and is completely unpowered.
- Grasp the top grate and firmly pull straight up, away from the unit housing.
- Remove the activated carbon filter and set aside.
Step 2: Remove the HEPA filter
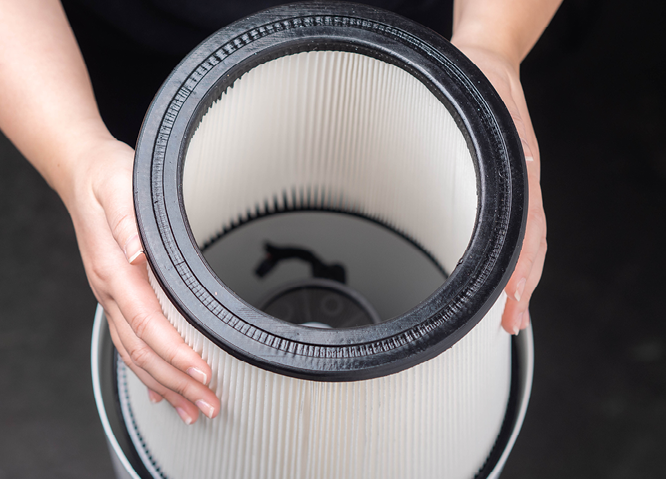
- Lift the HEPA filter straight up out of the body of the unit.
- You may need to shift the filter from side to side to avoid dislodging the black jacketed wire assembly.
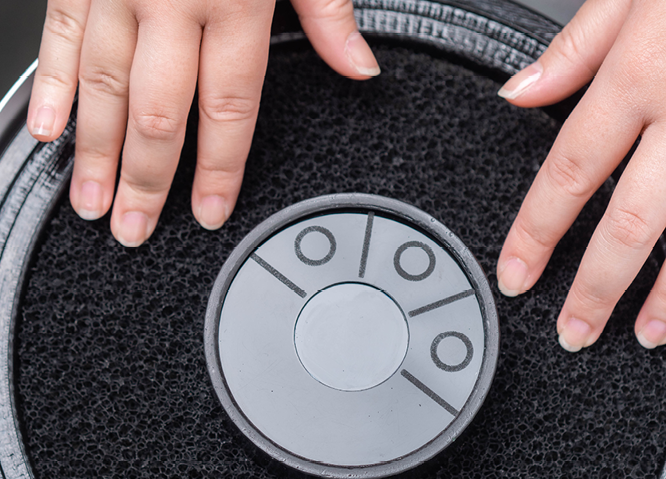
Step 3: Slip the Nanofilter sock over the HEPA filter
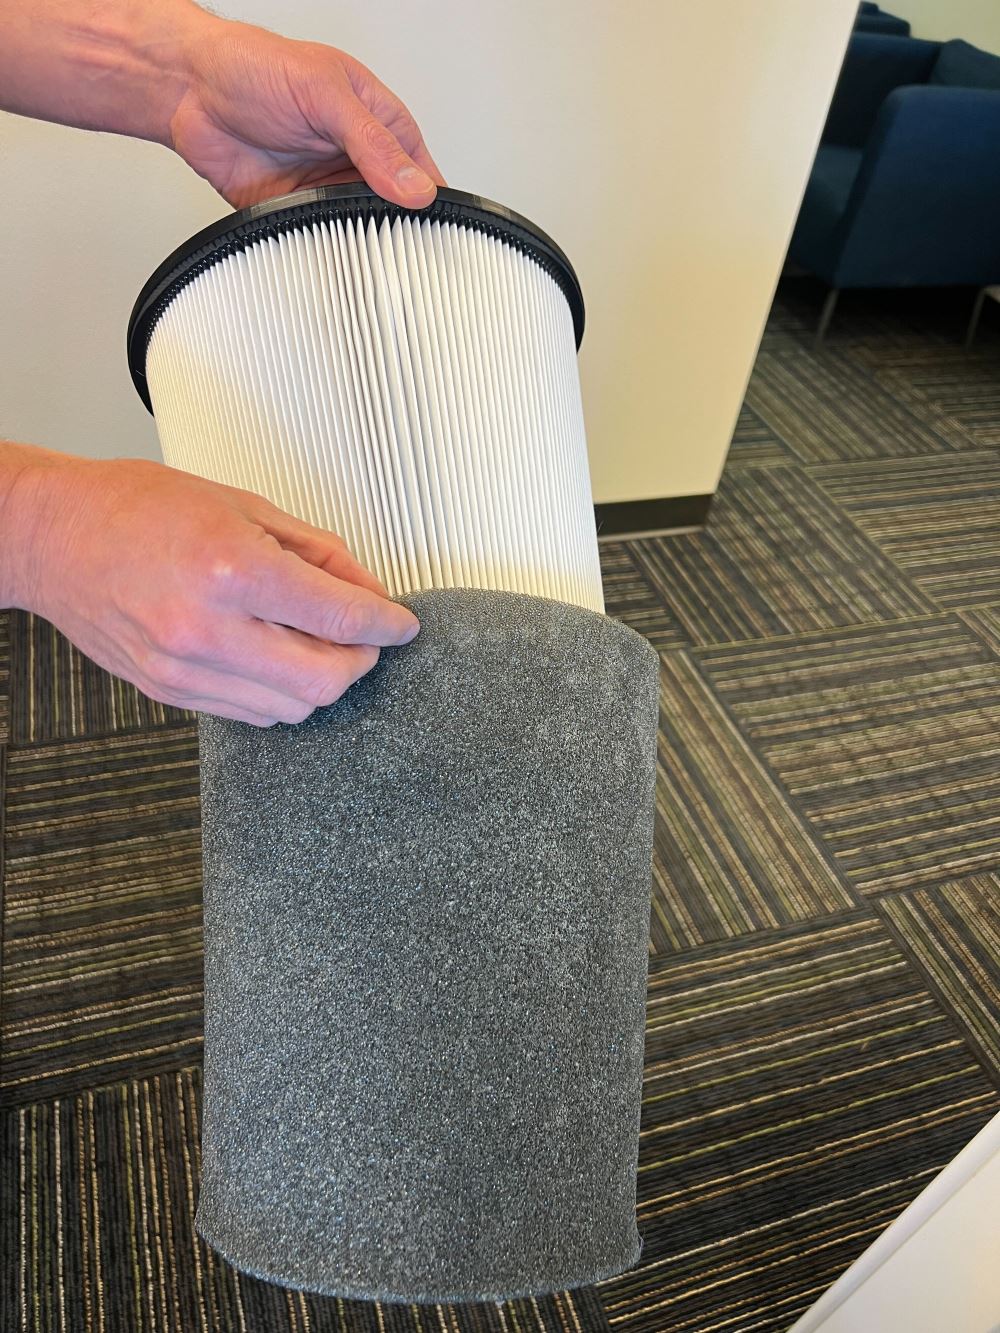
- Remove the Nanofilter from its bag.
- Slip the Nanofilter sock over the HEPA filter.
⚠️ The HEPA filter assembly depresses a safety switch on the bottom of the unit. Please make sure the HEPA filter is properly installed or the unit will not turn on.
Step 4: Insert the filters back into the VM
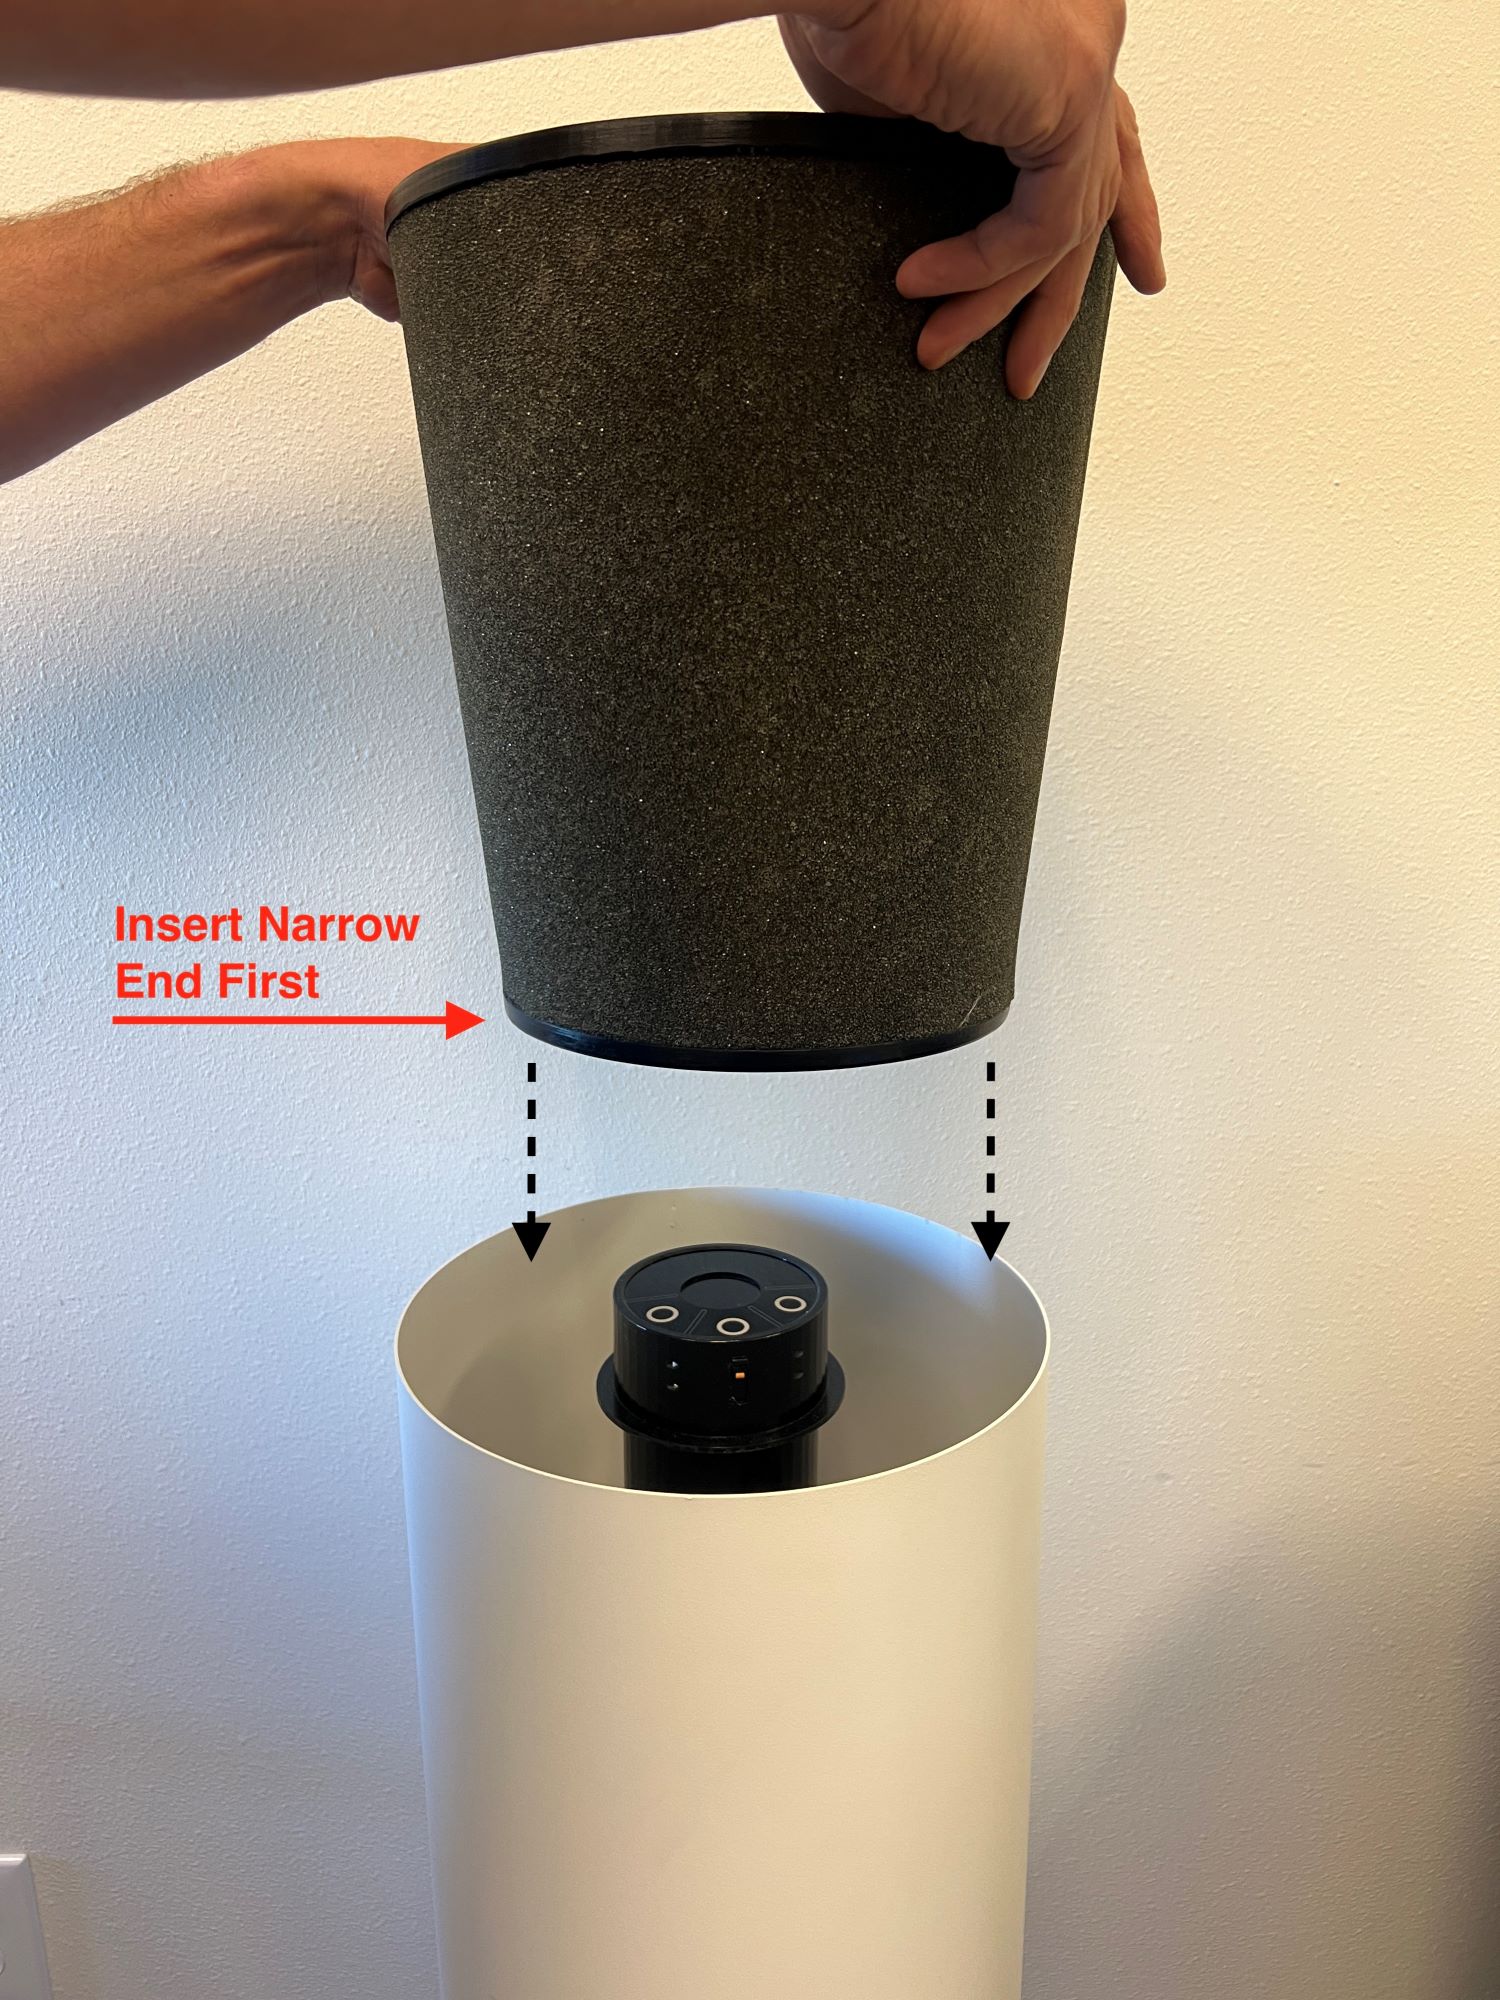
- Place the combined HEPA filter and Nanofilter back in the assembly, narrow side down.
Step 5: Replace the activated carbon filter
- Lightly place the activated carbon filter on top of the HEPA filter.
⚠️ Make sure no HEPA filter pleats are visible after replacing the activated carbon filter. If HEPA filter pleats are showing, remove the activated carbon filter and reset its position.
Step 6: Replace the VM grate
- Replace the top grate, pushing firmly to ensure a tight fit.
⚠️ There is a safety switch that will not allow the unit to power up if the top grate is removed. Verify that the grate is fully seated into its original position.
Step 7: Plug in and power on the VM
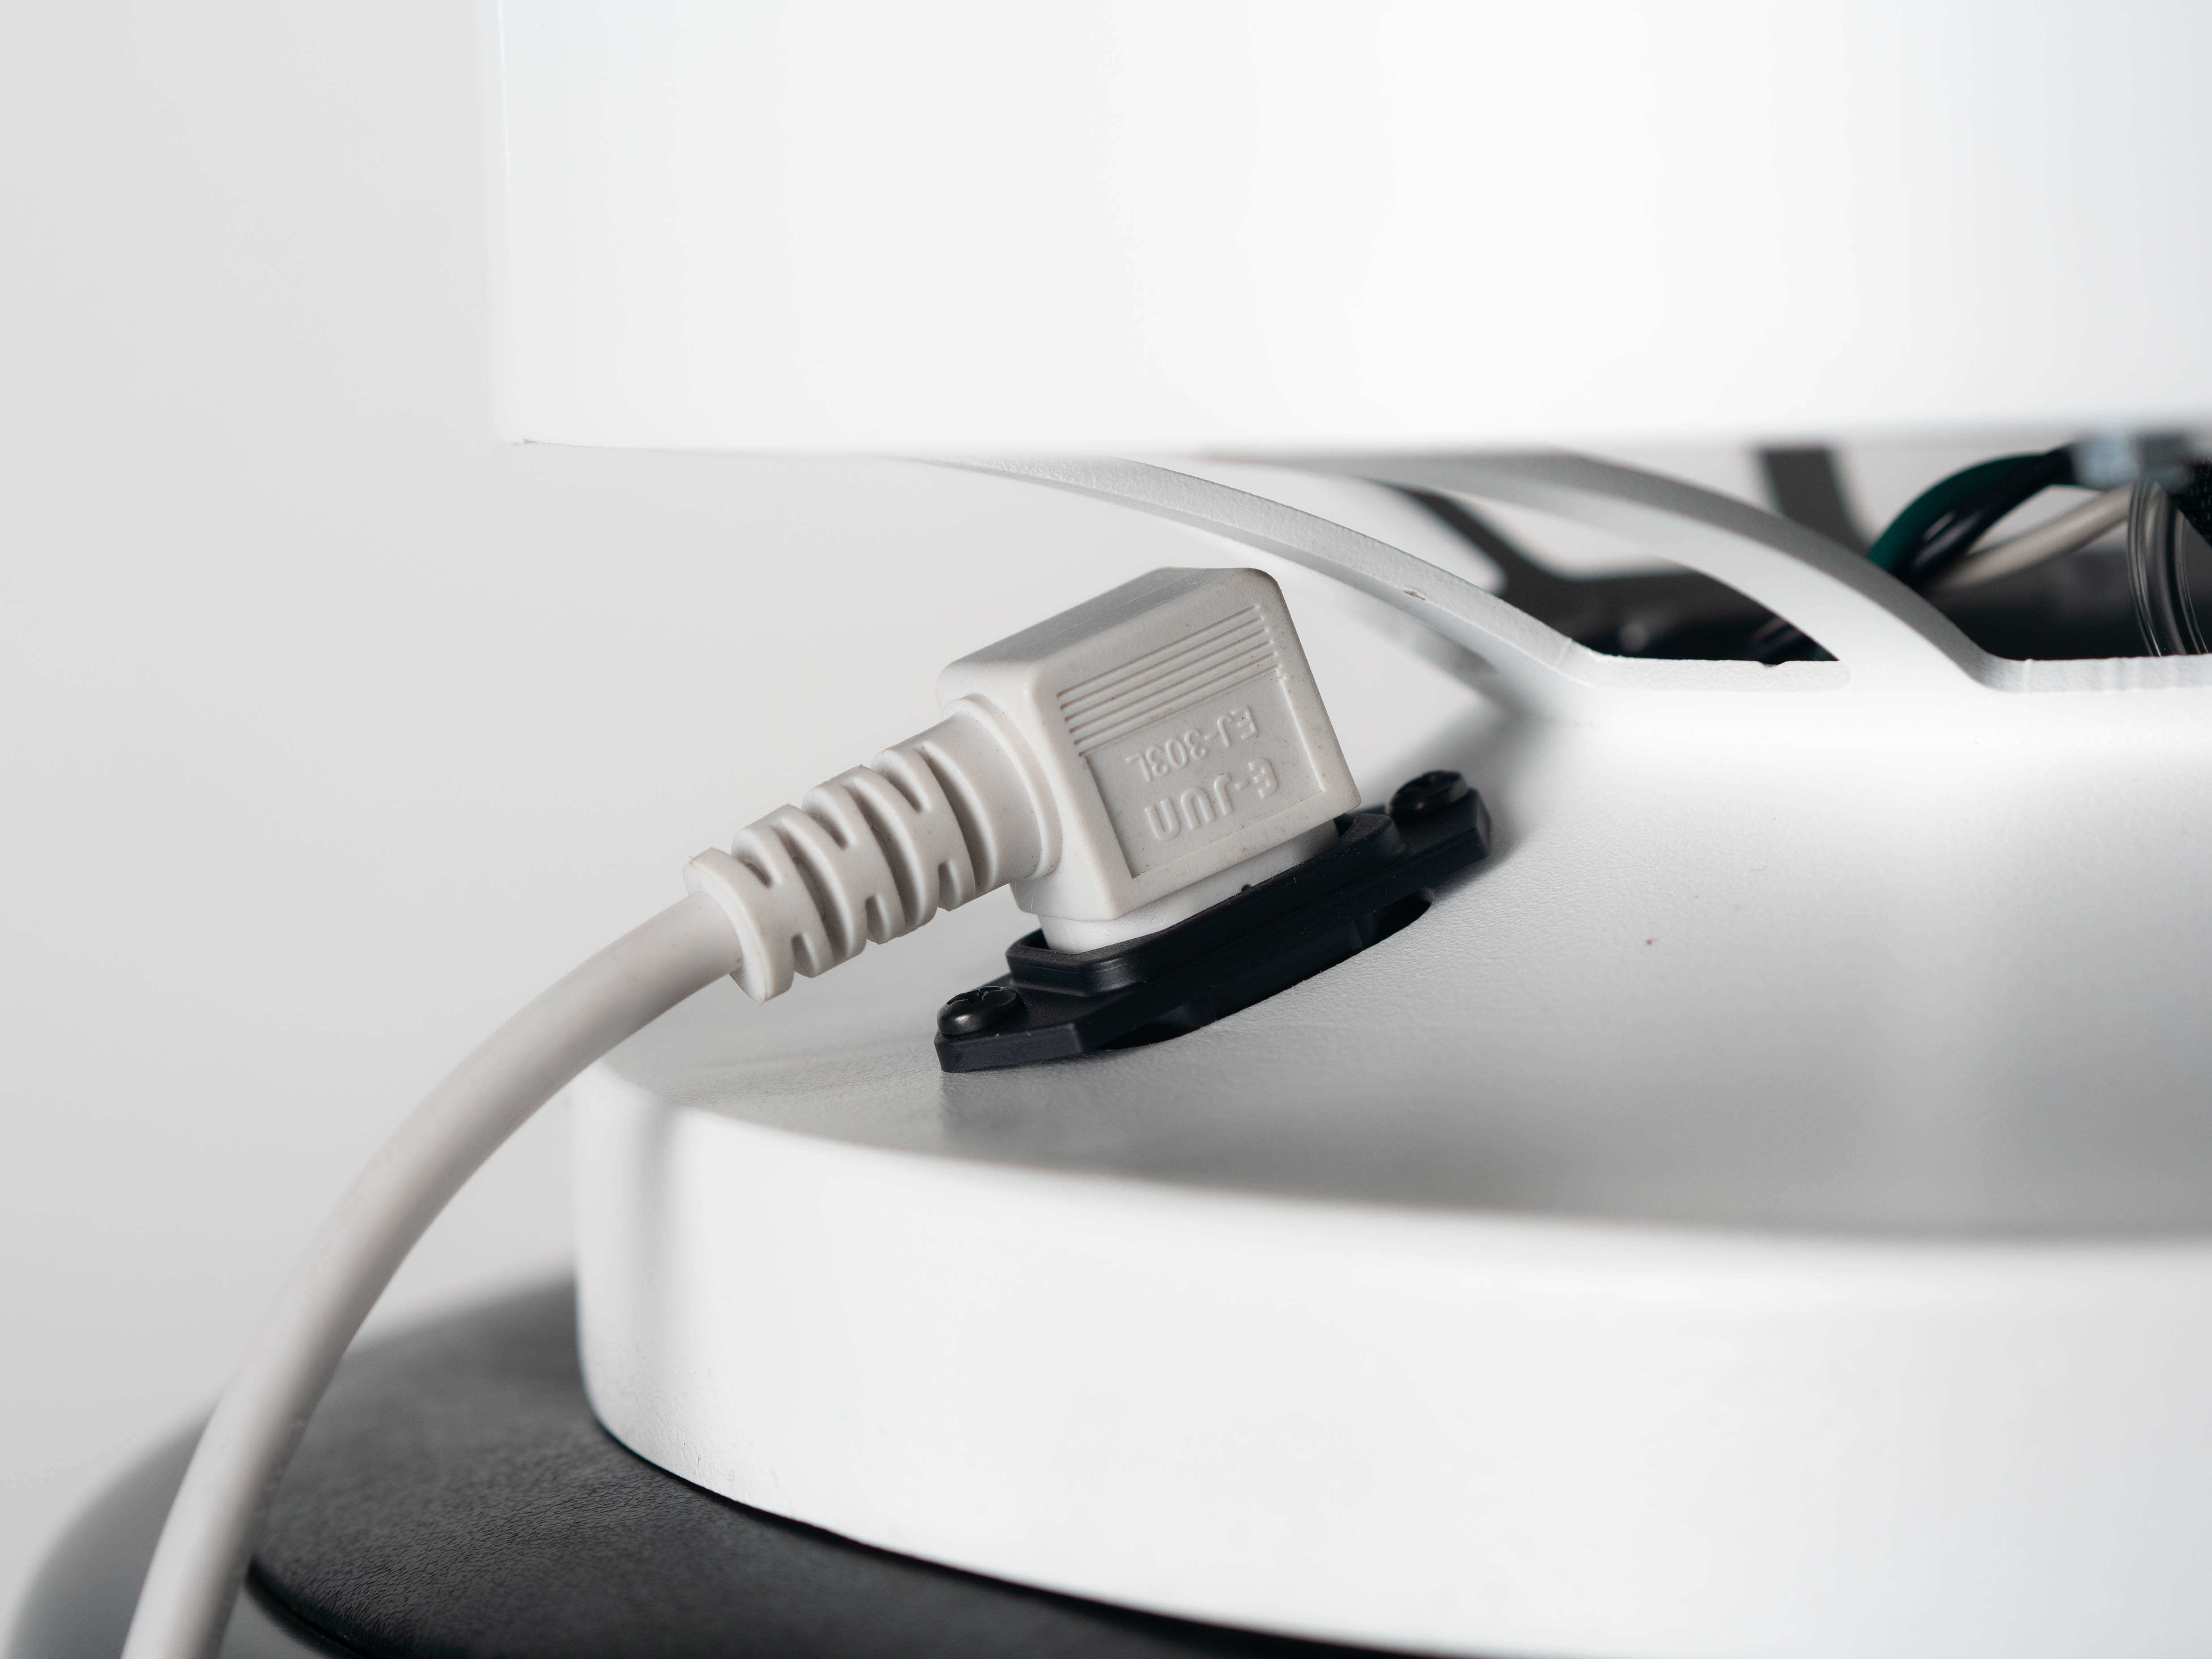
- Plug in your Violett VM at the device base.
- Plug the VM into a wall receptacle.
- Power on the VM.
3. Connecting the VM to WiFi
Connecting the VM to WiFi allows you to monitor air quality and control the device remotely.
⚠️ The WiFi setup process requires either a Google Chrome or Microsoft Edge browser on a laptop or desktop computer.
⚠️ Please make sure your computer is within 10 feet of your VM before following the steps below.
Step 1: Log into the Violett Dashboard

- Navigate to the Violett website and log into the Dashboard.
- Create a new user account or log into an existing account.
Step 2: "Add Device" in the Violett Dashboard

- Click the “Add Device” button in the Dashboard homepage.
Step 3: Enable pairing mode on the VM
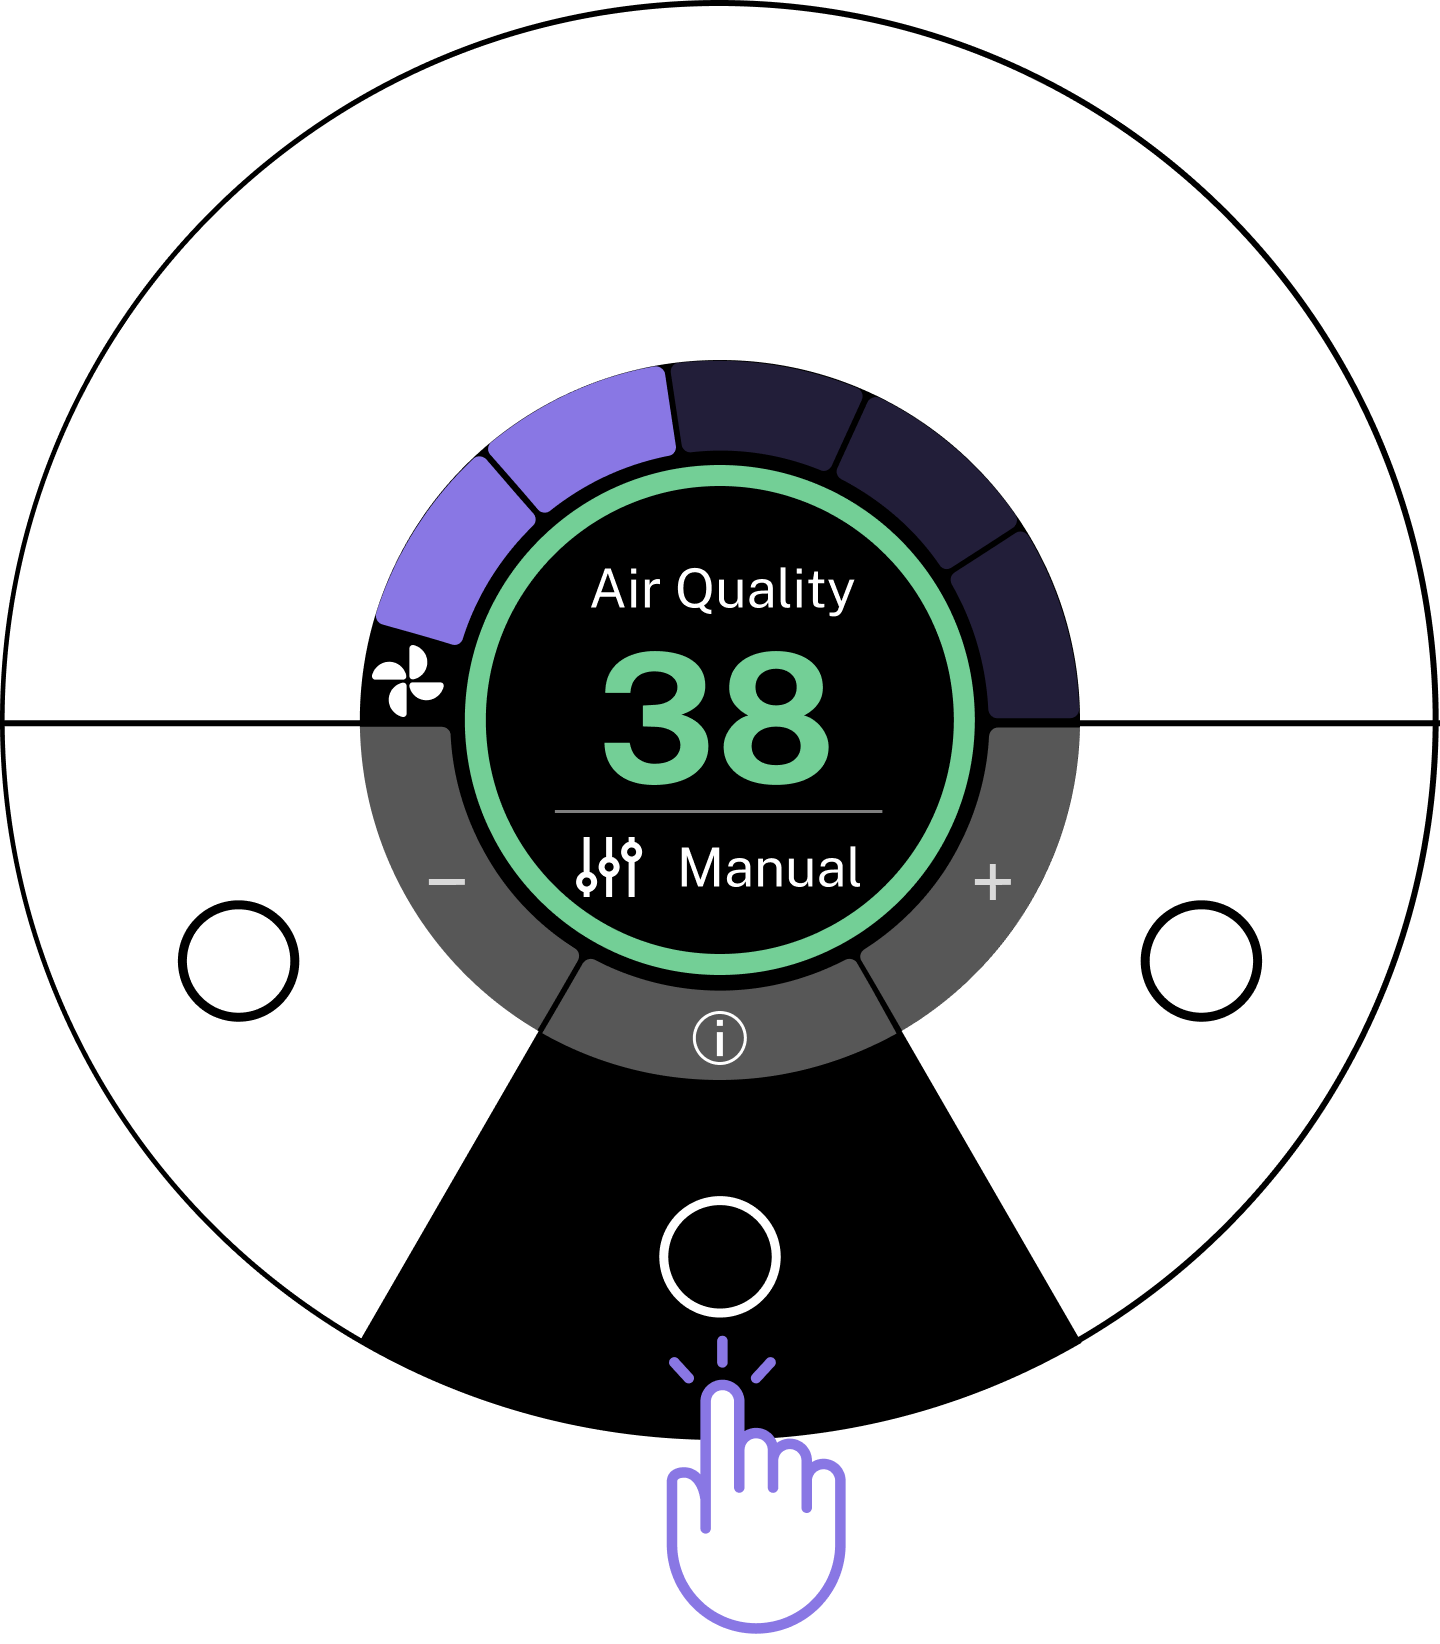
- Ensure the VM is on.
- Tap the middle info button on the VM until you see the Wi-Fi status screen.
Start Wi-Fi Pairing from your VM

- Once the Wi-Fi screen is displayed hold the center button for 5 seconds to place the device into pairing mode.
Step 4: Return to the Dashboard
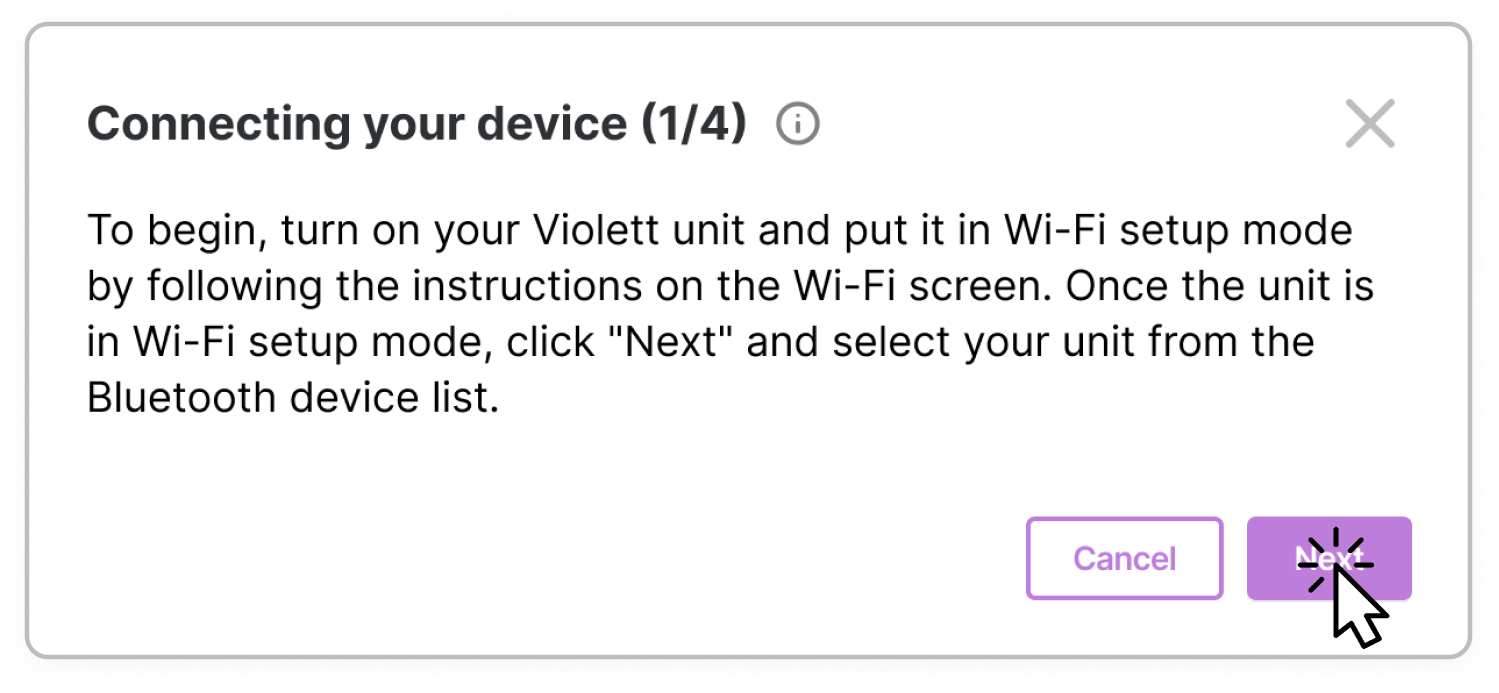
- Select "Next"
Step 5: Select the Violett device to pair

- Your computer’s Bluetooth will scan for nearby devices to connect to.
- Once your device appears in the pairing window select it and click "Pair".
Step 6: Input your Wi-Fi information

- You will be prompted to select your Wi-Fi network and enter its password.
- Select “Next” to continue.
- The device is now paired to the Wi-Fi network and will appear in your Violett Dashboard.
Step 7: Name your device
.png)
Step 8: Set up a location for your device (Optional)

- You can assign it to a physical location on an uploaded map, or save it without a location.
That's it!
Please contact us if you need help, or have any questions about the setup process. We'd love to hear from you.